
Chamberlain LiftMaster Professional 1 1/3 HP: A Comprehensive Guide
This guide details the Chamberlain LiftMaster 1 1/3 HP opener, covering installation, safety, programming, and troubleshooting.
It references official documentation and accessories like the GDC1s enclosure and 940EV keyless entry systems, ensuring proper usage.
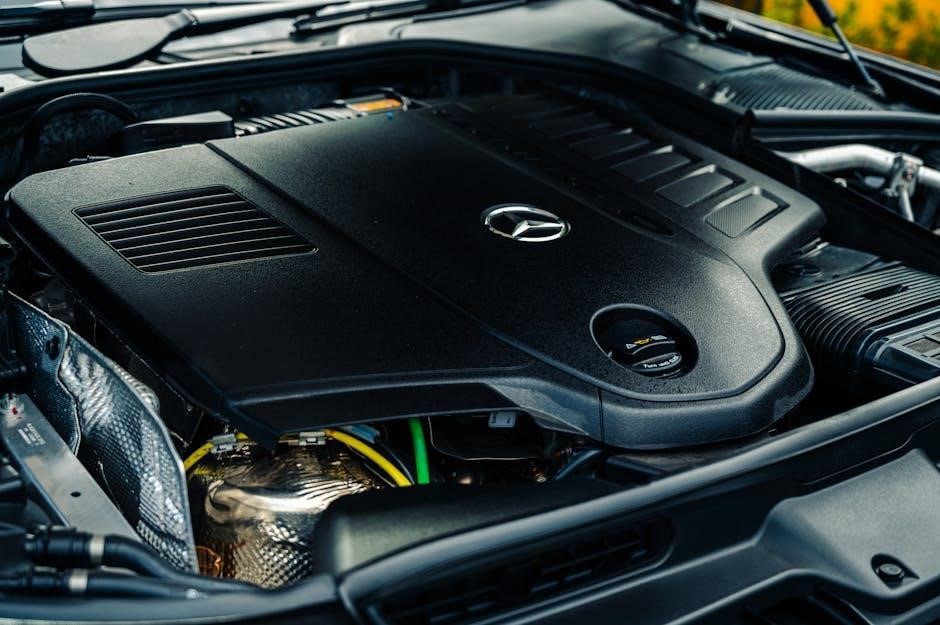
The LiftMaster Professional 1 1/3 HP garage door opener represents a robust solution for residential use, offering reliable performance and advanced features. This opener, manufactured by Chamberlain, is designed for sectional and one-piece doors, demanding careful installation following the provided owner’s manual. Understanding the system’s capabilities, including compatibility with accessories like the 940EV wireless keyless entry, is crucial.
This guide serves as a companion to the official Chamberlain documentation, offering detailed insights into installation steps, safety precautions, programming procedures, and troubleshooting common issues. Proper citation of Chamberlain resources – including websites and manuals – is emphasized. The 1 1/3 HP model benefits from the GDC1s enclosure for enhanced connectivity, and its operation requires adherence to safety guidelines for optimal functionality and longevity.
Understanding the Model Number and Compatibility
The LiftMaster Professional 1 1/3 HP model number signifies its power and intended application. Compatibility extends to various garage door types, including sectional and one-piece designs, though installation procedures differ. Crucially, this opener functions with Chamberlain garage door openers manufactured after January 1, 1993, and supports 315 MHz or 390 MHz frequencies.
Accessory compatibility is a key feature; the 940EV/940EVC wireless keyless entry systems integrate seamlessly. The GDC1s enclosure enhances connectivity, enabling smart home integration. Referencing the instruction manual is vital to confirm compatibility with specific door weights and sizes. Proper understanding of these specifications ensures optimal performance and avoids potential operational issues, maximizing the lifespan of your LiftMaster system.

Safety Precautions & Warnings
Prioritize safety during installation and operation. Always disconnect power before servicing, understand emergency release procedures, and review all safety information within the owner’s manual.
General Garage Door Opener Safety
Garage door openers are powerful devices, and adhering to safety guidelines is crucial. Never allow children to operate the opener or play near the door. Regularly inspect the door’s balance using the manual release; a properly balanced door should remain stationary midway.
Keep the area around the door clear of obstructions. Never operate the opener while anyone is passing through the door. Test the safety reversal system monthly – the door should immediately reverse upon encountering an obstacle in its path.
Ensure all safety sensors are properly aligned and unobstructed. Disconnect power before making any repairs or adjustments. Familiarize yourself with the emergency release mechanism for manual operation in case of power outages. Always consult the full owner’s manual for comprehensive safety instructions.
Specific Safety Concerns for the 1 1/3 HP Model
The 1 1/3 HP LiftMaster Professional offers increased lifting power, necessitating extra caution. Due to its strength, ensure the garage door itself is appropriately rated to handle the increased force; improper door selection could lead to damage or failure.
Pay close attention during force setting adjustments – excessive force can compromise safety features. Regularly verify the sensitivity of the safety sensors, as a more powerful motor might require finer tuning.
When installing accessories like the GDC1s enclosure, confirm compatibility and secure wiring to prevent interference with safety systems. Always prioritize a thorough understanding of the manual and heed all warnings regarding the opener’s enhanced capabilities.
Emergency Release Procedures
In emergencies, the LiftMaster 1 1/3 HP opener features a manual release mechanism. Locate the emergency release cord, typically hanging from the central rail. Pulling this cord disengages the motor, allowing manual operation of the garage door – exercise caution, as the door may be heavy.
After disengaging, the door can be lifted or lowered by hand. To re-engage, simply pull the cord towards the opener until it clicks back into place. Always test the opener’s functionality after re-engagement to ensure proper operation.
Familiarize yourself with this procedure before an emergency arises. Refer to the instruction manual for specific illustrations and warnings related to the release mechanism.
Installation Guide
Proper installation is crucial. This section details unboxing, inventory, and step-by-step instructions for both sectional and one-piece doors, ensuring safe and effective operation.
Unboxing and Inventory of Parts
Carefully unpack the Chamberlain LiftMaster 1 1/3 HP opener box, ensuring all components are present before proceeding. The opener carton inventory should include the power unit, rail sections, chain or belt drive, safety sensors, remote controls, mounting hardware, and the instruction manual itself.
Verify each item against the parts list within the manual to confirm nothing is missing. Pay close attention to smaller components like bolts, nuts, and washers, as these are easily misplaced. Inspect all parts for any shipping damage. If any parts are damaged or missing, contact Chamberlain customer support immediately for replacements. Retain the original packaging until the installation is complete and you are satisfied with the product. A complete inventory prevents delays during the installation process.
Sectional Door Installation Steps
Begin by assembling the rail sections, connecting them securely according to the manual’s diagrams. Attach the rail to the header bracket above the sectional door, ensuring it’s level and properly aligned. Next, connect the door bracket to the bottom of the door, and then attach the arm to both the door bracket and the opener carriage.
Carefully follow the manual’s instructions for adjusting the door arm length to ensure smooth operation. Install the safety sensors on both sides of the door opening, at the recommended height, and connect the wiring to the opener unit. Double-check all connections and ensure the door moves freely before proceeding to programming. Proper alignment is crucial for safe and reliable operation.
One-Piece Door Installation Steps
Installing on a one-piece door requires specific bracing and reinforcement due to the door’s construction. Begin by securely mounting the header bracket to the ceiling joists, ensuring it can support the door’s weight. Attach the door bracket directly to the door itself, using appropriate hardware for a strong connection.
Connect the opener arm between the door bracket and the carriage, carefully adjusting the arm length as detailed in the manual. One-piece doors often require precise adjustments to ensure smooth lifting and lowering. Install and wire the safety sensors, verifying their proper function. Thoroughly test the operation, paying close attention to any binding or resistance, and adjust accordingly.
Mounting the Opener Unit
Securely mounting the opener unit is crucial for stable operation. Begin by assembling the rail sections, ensuring proper alignment and connection. Position the assembled rail and opener unit beneath the ceiling, utilizing the pre-drilled holes for mounting brackets. Attach the brackets to ceiling joists using lag screws or bolts, verifying they are firmly secured.
Carefully lift the opener unit onto the mounted brackets, aligning the mounting points. Double-check that all connections are tight and secure before proceeding. Connect the electrical power supply, adhering to all safety precautions. Finally, verify the unit is level and stable before initiating programming and testing procedures.

Programming & Settings
Customize your LiftMaster with remote programming, travel limit adjustments, and force settings. Enable MyQ connectivity for smartphone control and advanced features.
Remote Control Programming
Programming your LiftMaster remote is straightforward. Begin by ensuring the opener is compatible with your remote’s frequency (315 MHz or 390 MHz, post-1993). Locate the “Learn” button on the opener unit – it’s typically yellow or orange. Press and release this button. Within 30 seconds, press and hold the button on your remote until the opener’s light flashes, indicating successful programming.
If multiple remotes need programming, repeat this process for each one. For older remotes, consult the specific remote’s manual for alternative programming methods. If programming fails, try clearing existing remote codes by pressing and holding the “Learn” button until the light goes out, then re-attempt the programming sequence. Always refer to the Chamberlain/LiftMaster instruction manual for detailed, model-specific instructions.
Travel Limit Adjustment
Adjusting travel limits ensures the door opens and closes to your desired heights. Locate the adjustment dials on the opener unit – typically labeled “Up” and “Down”. Use a screwdriver to make small adjustments. Clockwise rotation increases the travel distance, while counterclockwise decreases it.

Start with minor adjustments and test the door’s operation after each change. The “Up” limit controls how far the door opens, while the “Down” limit sets the closed position. Ensure the door doesn’t reverse prematurely or travel beyond its intended limits. Refer to the instruction manual for specific dial sensitivity information. Precise adjustment prevents strain on the door and opener, extending their lifespan.
Force Setting Adjustment
Force settings dictate the power applied to overcome door resistance. Locate the force adjustment dials, usually marked “Up/Down” or with a similar designation, on the opener unit. These control the power used during closing and opening. Adjusting these settings is crucial for smooth operation and safety.
Start with the lowest force setting and gradually increase it until the door operates smoothly without reversing unexpectedly. Avoid excessive force, as it can damage the door or opener. The manual details specific settings for different door weights and conditions. Proper adjustment ensures the safety sensors function correctly, preventing the door from closing on obstructions. Regularly check these settings for optimal performance.
MyQ Connectivity & Setup
MyQ technology enables remote control and monitoring of your garage door via a smartphone app. Begin by downloading the MyQ app from your device’s app store. Ensure your opener is compatible – most LiftMaster Professional 1 1/3 HP models are. The GDC1s enclosure, when used, facilitates a stable connection.
Follow the in-app instructions to create an account and connect your opener. The app will guide you through the process of linking the opener to your home’s Wi-Fi network. Once connected, you can open/close the door, receive activity alerts, and set schedules. Refer to the manual for specific troubleshooting steps if the connection fails. MyQ enhances security and convenience.

Maintenance & Troubleshooting
Regular maintenance ensures optimal performance. This section covers schedules, motor noise issues, remote control problems, and unexpected door reversals, referencing the manual.
Regular Maintenance Schedule
Maintaining your Chamberlain LiftMaster 1 1/3 HP opener is crucial for longevity and safety. A monthly visual inspection should be performed, checking for loose hardware, frayed cables, and proper spring tension. Lubricate all moving parts – rollers, hinges, and the opener’s chain or belt drive – every six months using a lithium-based grease.
Test the safety reversal system monthly by placing a one-inch object in the door’s path. The door should immediately reverse. Inspect the photo-eye sensors, ensuring they are aligned and free from obstructions. Clean the sensors with a soft cloth. Annually, tighten all bolts and nuts. Refer to the owner’s manual for detailed diagrams and specific lubrication points. Following this schedule minimizes potential issues and ensures reliable operation.
Troubleshooting Common Issues (Motor Noise)
Excessive motor noise often indicates a few common problems. First, check the chain or belt drive; it may require lubrication. A noisy motor could also stem from loose mounting brackets – tighten all bolts. Inspect the rollers and tracks for obstructions or damage, as these can cause strain and noise.
If the noise is a grinding sound, the gears within the opener unit might be worn and require professional attention. Humming without movement suggests a potential issue with the capacitor. Always disconnect power before inspecting internal components. Consult the owner’s manual for diagrams and safety precautions. If the noise persists after these checks, contact a qualified technician.
Troubleshooting Common Issues (Remote Not Working)
A non-responsive remote often points to battery issues. Replace the batteries with fresh ones, ensuring correct polarity. Next, verify the remote is programmed to the opener unit – re-programming may be necessary, following the manual’s instructions. Check for obstructions between the remote and the opener’s antenna.
Interference from other devices can also disrupt the signal. Try moving potential sources of interference, like wireless routers, away from the opener. If multiple remotes aren’t working, the receiver in the opener unit might be faulty. Consult the manual for troubleshooting steps or contact Chamberlain support for assistance.
Troubleshooting Common Issues (Door Reverses Unexpectedly)
Unexpected door reversal typically indicates a safety sensor misalignment. Ensure the sensors, located near the floor, are aligned and free of obstructions. Clean the sensor lenses with a soft cloth. Next, check the force settings – if set too low, the opener may interpret minor resistance as an obstruction. Adjust the force settings carefully, following the manual’s guidance.
A binding door or issues with the tracks can also cause reversal. Inspect the door’s hinges and rollers for smooth operation. Verify the tracks are clear and properly aligned. If the problem persists, the limit switches might need adjustment or the opener itself may require professional servicing.

Advanced Features & Options
Enhance your LiftMaster with options like wireless keyless entry (940EV/940EVC) and the GDC1s enclosure for connectivity. Explore compatibility with various Chamberlain/LiftMaster accessories.
Wireless Keyless Entry System (940EV/940EVC)
The Chamberlain 940EV and 940EVC wireless keyless entry systems provide convenient, secure access to your garage without needing a remote or key. These systems are designed for use with Chamberlain garage door openers manufactured after January 1, 1993, and operate on 315 MHz or 390 MHz frequencies.
Installation involves programming the keypad to communicate with your LiftMaster opener. This typically requires accessing the opener’s learn mode and entering a code on the keypad. The user manual details specific steps for your model. The keypad allows for multiple user codes, enhancing security and granting access to family members or trusted individuals. Remember to keep your codes confidential.
Troubleshooting often involves checking battery levels and ensuring proper programming. Refer to the 940EV/940EVC manual for detailed instructions and support.
Compatibility with Chamberlain/LiftMaster Accessories
The LiftMaster Professional 1 1/3 HP opener seamlessly integrates with a wide range of Chamberlain and LiftMaster accessories, expanding functionality and convenience. These include additional remote controls, wall-mounted controls, and smart home integration systems like MyQ.

Compatibility extends to safety sensors, ensuring the door reverses upon obstruction. The GDC1s enclosure, used for enhanced connectivity, also works with this model, facilitating smart device control. When adding accessories, always verify compatibility with your specific opener model and frequency (315 MHz or 390 MHz).
Refer to the Chamberlain website or your opener’s manual for a complete list of compatible accessories. Proper installation and programming, as outlined in the accessory manuals, are crucial for optimal performance.
Using the GDC1s Enclosure for Connectivity
The GDC1s enclosure enhances the LiftMaster Professional 1 1/3 HP’s connectivity, enabling smart home integration via MyQ. Installation involves plugging the GDC1s near the garage door opener controller (Figure 1 in documentation). Follow the controller’s instructions to add the device, essentially pairing it for network access.
This allows remote control, monitoring, and receiving alerts through the MyQ app. Ensure a stable Wi-Fi connection for reliable performance. The GDC1s facilitates over-the-air updates, keeping your opener’s software current.
Troubleshooting connectivity issues often involves checking the Wi-Fi signal and restarting both the GDC1s and the garage door opener. Refer to Chamberlain’s online resources for detailed setup guides and support.

Technical Specifications
This section details the 1 1/3 HP motor’s power, dimensions, and electrical requirements. Refer to Chamberlain’s documentation for precise specifications and compatibility details.
Motor Specifications (1 1/3 HP)
The Chamberlain LiftMaster Professional 1 1/3 HP garage door opener utilizes a robust motor designed for reliable performance. This motor delivers sufficient power for most standard residential garage doors, ensuring smooth and efficient operation. While specific details may vary slightly depending on the manufacturing date, the motor generally operates on standard household voltage.
It’s crucial to consult the official Chamberlain documentation for precise motor specifications, including RPM (revolutions per minute) and torque ratings. Understanding these specifications is vital for proper maintenance and troubleshooting. The 1 1/3 HP rating indicates the motor’s horsepower, a key factor in determining its lifting capacity and overall performance. Always refer to the manual for detailed technical information.
Power Requirements & Electrical Considerations
The Chamberlain LiftMaster Professional 1 1/3 HP opener typically requires a standard 120V, 60Hz electrical supply. A dedicated 15-amp circuit is generally recommended to prevent overloading and ensure reliable operation. Always disconnect power at the breaker before performing any electrical work;
Proper grounding is essential for safety and to prevent electrical shock. The opener must be connected to a grounded outlet. Consult a qualified electrician if you are unsure about your electrical system’s compatibility or if you need to install a new outlet. Never modify the power cord or plug. Adhering to these electrical considerations is crucial for safe and effective operation of your LiftMaster opener.
Dimensional Specifications
Understanding the physical dimensions of the Chamberlain LiftMaster Professional 1 1/3 HP opener is vital for proper installation. The unit’s overall length typically ranges from 41 to 48 inches, depending on the rail configuration. Height is generally around 8-10 inches, and width approximately 7-9 inches.
These measurements are approximate and can vary slightly. Carefully measure your garage space to ensure adequate clearance for the opener, rail, and door travel. Consider headroom limitations and potential obstructions. Refer to the official instruction manual for precise dimensional drawings and specifications specific to your model. Accurate measurements prevent installation issues and ensure optimal performance.

Citing Chamberlain/LiftMaster Documentation
Properly cite the instruction manual, Chamberlain websites, and online resources using APA, MLA, or Harvard styles to maintain academic integrity and credibility.
Properly Citing the Instruction Manual
When referencing the Chamberlain LiftMaster Professional 1 1/3 HP instruction manual, adhere to specific formatting guidelines depending on your chosen citation style. Generally, include the manufacturer (Chamberlain), the model number (e.g., 2000E, 5000E), the year of publication (often found within the manual itself), and the page number if referencing specific information.
For APA style, the citation would typically follow the author-date format. MLA style emphasizes the author and page number. Harvard style often uses a numbered or author-date system within the text and a corresponding reference list entry. Always consult the latest edition of your chosen style guide for precise formatting rules. Remember to consistently apply the chosen style throughout your work. Accurate citation demonstrates respect for intellectual property and enhances the credibility of your research.
Citing Chamberlain Websites & Online Resources
When citing information from Chamberlain’s official website regarding the LiftMaster Professional 1 1/3 HP, prioritize accuracy and consistency. Include the webpage title, the website name (Chamberlain), the publication or update date (if available), and the direct URL. If the webpage lists an author, include their name.
Utilize citation generators for automated formatting in APA, MLA, or Harvard styles. However, always double-check the generated citation for errors. If referencing general information from the website without a specific author or date, use the website name in the text and provide the URL in parentheses. Remember that simply mentioning a website doesn’t require a formal reference list entry. Proper citation upholds academic integrity and allows readers to verify your sources.
APA, MLA, and Harvard Citation Styles for Chamberlain Resources
For APA style, a Chamberlain webpage citation typically includes the author (if available), year, title of the page, and URL. MLA style emphasizes the author, title of the page in quotation marks, website name in italics, and access date. Harvard style generally requires the author, year, title, and URL, often utilizing a numbered in-text citation system.
When citing the LiftMaster instruction manual, treat it as a report. Include the manual’s title, Chamberlain as the author, the publication year, and the URL if accessed online. Citation generators can assist, but manual verification is crucial. Consistency within your chosen style is paramount. Always consult the latest edition of each style guide for precise formatting rules.