Foxbody Manual Steering Rack: A Comprehensive Guide (Updated 02/26/2026)
Foxbody steering, utilizing a rack and pinion system, offers direct control. Some racks are prone to leaks, impacting performance and requiring careful attention.
The Foxbody Mustang’s steering system, a cornerstone of its driving experience, traditionally employed a rack and pinion setup – a significant engineering advancement allowing for precise directional control. While power steering was an option, many enthusiasts favor the direct connection offered by a manual steering rack.
This preference stems from a desire for enhanced road feel and a more engaging driving experience. The rack and pinion design itself is inherently efficient, translating steering wheel input directly into wheel movement. However, age and use can introduce issues, like leaks, even in manual systems due to seal degradation. Understanding the nuances of the Foxbody steering system is crucial for maintaining its responsiveness and enjoying the classic Mustang feel.
Why Choose Manual Steering?
Opting for a manual steering rack in your Foxbody Mustang delivers a uniquely connected driving experience. Removing the power steering pump and associated components results in noticeable weight reduction, contributing to improved handling and potentially increased performance. Beyond weight savings, manual steering provides superior steering feel and feedback, allowing drivers to directly sense the road conditions.
Furthermore, a manual setup simplifies the system, reducing potential failure points and offering cost savings – both initially and in long-term maintenance. While requiring more effort at low speeds, the enhanced control and responsiveness often outweigh this drawback for enthusiasts seeking a purist driving experience.
Understanding the Foxbody Steering System
The Foxbody’s steering system, whether equipped with power or manual steering, fundamentally relies on a rack and pinion design. This system translates the rotational motion of the steering wheel into linear motion, directing the front wheels. In a manual setup, driver effort directly actuates the rack, unlike power steering which uses hydraulic assistance.
Key components include the steering column, connecting to the manual steering rack itself. The rack’s movement is then transferred via tie rods to the steering knuckles, ultimately controlling wheel direction. Understanding this interconnectedness is crucial for diagnosis and repair, especially considering potential issues like leaks or play within the system.
Components of the Manual Steering Rack
Essential parts include the rack itself, the steering column connection, the Pitman and idler arms, and tie rods with ball joints, enabling precise control.
The Manual Steering Rack Itself
The core of the system, the Foxbody manual steering rack, is a robust unit translating rotational motion from the steering column into linear motion. This linear movement directly acts upon the tie rods, initiating the turning of the front wheels. Unlike power steering racks, manual racks lack hydraulic assistance, demanding more driver effort.
Construction typically involves a metal housing containing a pinion gear that meshes with a toothed rack. This design provides a direct and responsive feel, favored by enthusiasts seeking greater road feedback. Inspecting the rack for corrosion, damage to the teeth, or internal leaks (even in manual systems, seals can fail) is crucial during maintenance. A well-maintained rack ensures precise steering and enhances the driving experience.
Steering Column Connection
The steering column’s connection to the manual steering rack is a critical link, transmitting the driver’s input. Typically, a U-joint or rag joint connects the steering shaft to the pinion shaft within the rack housing. This flexible coupling absorbs vibrations and allows for slight misalignment, preventing binding.
Proper alignment is essential; any looseness or play in this connection directly translates to imprecise steering. Inspect the U-joint or rag joint for wear, cracks, or excessive play. Ensuring a secure and properly aligned connection is paramount for responsive steering. Tightening the retaining bolts to the manufacturer’s specifications is vital for safe operation and optimal performance.
Pitman Arm and Idler Arm
In a Foxbody’s manual steering system, the Pitman arm and idler arm play a crucial role in translating the rack’s linear motion into rotational movement for the wheels. The Pitman arm, bolted directly to the steering rack’s sector shaft, converts the rack’s side-to-side motion into a rotating force.
The idler arm, positioned on the opposite side of the steering box, supports the center link and helps maintain steering stability. Worn ball joints in either arm introduce play, leading to imprecise steering and potential safety concerns. Regular inspection and replacement of these components are vital for maintaining a responsive and reliable steering system.
Tie Rods and Ball Joints
Tie rods and ball joints are critical links in the Foxbody’s manual steering system, directly connecting the steering rack to the wheels. Inner and outer tie rods transmit the steering force, while ball joints allow for smooth, controlled wheel movement. These components are subject to significant stress and wear, particularly from road impacts and consistent use.
Worn tie rod ends or ball joints introduce play into the steering, resulting in imprecise handling and potential instability. Regular inspection for looseness or damage is essential. Replacement should occur in pairs to ensure balanced steering geometry and optimal performance, maintaining safe and predictable vehicle control.
Benefits of a Manual Steering Rack Upgrade
Upgrading to a manual rack reduces weight, enhances steering feel, and provides a more direct connection to the road for improved control.
Improved Steering Feel and Feedback
Switching to a manual steering rack on your Foxbody dramatically alters the driving experience, prioritizing feel and feedback over power assistance. Unlike power steering systems that can mask road imperfections, a manual rack transmits a more direct connection to the road surface.
This heightened sensitivity allows drivers to intuitively understand what the front tires are doing, enhancing control and confidence, especially during spirited driving or track use. You’ll notice subtle changes in road texture and grip, providing valuable information for precise steering inputs.
The removal of hydraulic lines and the power steering pump also contributes to a cleaner, more responsive steering action, eliminating any potential lag or artificial weighting. This results in a more engaging and rewarding driving experience for enthusiasts.
Weight Reduction
One of the most significant benefits of converting to a manual steering rack on a Foxbody Mustang is the substantial weight savings. Eliminating the power steering pump, hydraulic lines, reservoir, and associated hardware removes a considerable amount of unnecessary mass from the front end of the vehicle.
This reduction in weight directly improves the car’s overall handling characteristics, contributing to quicker steering response and reduced body roll. Less weight over the front wheels also enhances traction, particularly during acceleration and braking.
For performance-oriented builds, where every pound counts, this weight reduction can translate into measurable gains on the track or during autocross events. It’s a simple yet effective modification for maximizing the Foxbody’s potential.
Cost Savings
Switching to a manual steering rack on a Foxbody Mustang presents a compelling financial advantage. The initial cost of a manual rack is typically lower than a comparable power steering unit. Beyond the initial purchase, significant long-term savings are realized by eliminating the potential for costly repairs associated with power steering components.
Power steering pumps can fail, hydraulic lines can leak, and steering gears can develop internal issues – all requiring expensive replacements. A manual system, being simpler in design, reduces the number of potential failure points, leading to lower maintenance costs over the vehicle’s lifespan.
This makes it an attractive option for budget-conscious enthusiasts.
Common Issues with Foxbody Manual Steering Racks
Foxbody manual racks can develop leaks from seals, exhibit steering play due to wear, and suffer corrosion. Tie rod ends also commonly wear out.
Leaks and Fluid Loss (Even in Manual Systems ౼ Seals)
While a manual steering system doesn’t utilize pressurized hydraulic fluid like power steering, leaks can still occur within the rack itself. These aren’t fluid-powered leaks, but rather seepage past the internal seals. Over time, the rubber seals within the Foxbody manual steering rack can dry out, crack, or become brittle due to age and temperature fluctuations.
This deterioration allows steering fluid – used for lubrication within the manual rack – to escape. Though not impacting steering assist, these leaks indicate internal wear and potential for further issues. Identifying leaks early is crucial; look for dampness around the rack housing and connections. Ignoring them can lead to increased wear and eventual rack failure, necessitating a replacement. Regular inspection is key to preventative maintenance.
Play in the Steering
Excessive play in the steering of your Foxbody indicates looseness within the manual steering system. This manifests as noticeable movement in the steering wheel before the front wheels respond. Internal wear within the rack itself is a primary culprit, as clearances increase between components like the pinion gear and rack gear.
Worn tie rod ends, ball joints, or even the idler arm can also contribute to this issue, amplifying the sensation of play. It’s crucial to differentiate between play originating from the rack versus these external components. Significant play compromises steering precision and responsiveness, impacting handling and driver confidence. Addressing this promptly is vital for safe vehicle operation and enjoyable driving.
Corrosion and Rust
Foxbody steering racks, particularly those exposed to harsh climates and road salt, are susceptible to corrosion and rust. This is especially true for older vehicles where preventative maintenance may have been lacking. Rust can form on the exterior of the rack, but more critically, it can attack internal components, leading to scoring and binding.
This internal corrosion increases friction, making steering heavier and less smooth. Advanced rust can even cause pitting and weakening of the rack housing, potentially leading to failure. Regular inspection and protective coatings can mitigate this issue, extending the rack’s lifespan and maintaining optimal steering performance. Ignoring corrosion invites costly repairs.
Worn Tie Rod Ends
Foxbody manual steering relies heavily on precise tie rod end function. Over time, these crucial components experience wear and tear from constant movement and road impacts. Worn tie rod ends introduce excessive play into the steering system, manifesting as vagueness and imprecise handling. This looseness can also cause uneven tire wear and difficulty maintaining a straight line.
Inspecting tie rod ends for looseness and damage is vital during routine maintenance. Symptoms include clunking noises during steering and a noticeable wobble in the front wheels. Replacing worn tie rod ends restores steering accuracy and improves overall vehicle safety, ensuring responsive control.
Replacing Your Foxbody Manual Steering Rack: A Step-by-Step Overview
Rack replacement demands specific tools and careful procedure. Proper removal, installation, and subsequent wheel alignment are critical for optimal steering performance and safety.
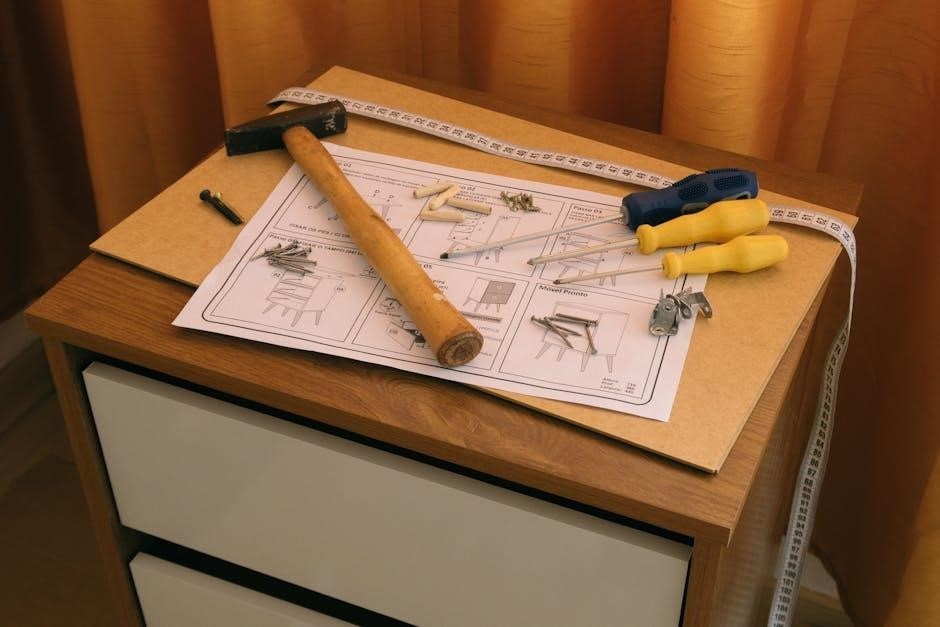
Tools Required
Successfully replacing your Foxbody’s manual steering rack necessitates a well-equipped toolkit. Essential items include a jack and jack stands for safe vehicle elevation, and a comprehensive socket set – both metric and standard – to handle various fasteners.
You’ll also need wrenches, specifically flare nut wrenches to avoid damaging the steering lines. A steering rack puller is crucial for safely separating the old rack from the vehicle. Don’t forget penetrating oil to loosen stubborn bolts, and a torque wrench to ensure proper tightening during reinstallation.
A drain pan is needed for any residual fluid, and safety glasses are paramount. Finally, having a rubber mallet and a set of pliers can prove invaluable during the process. Preparation is key for a smooth and efficient replacement!
Removal of the Old Rack
Begin by safely lifting the Foxbody and securing it with jack stands. Disconnect the tie rod ends from the steering knuckles, carefully noting their positions. Next, detach the steering column from the rack, usually involving a U-joint or rag joint.
Loosen and remove the mounting bolts securing the steering rack to the frame. Utilize a steering rack puller to gently separate the rack from the vehicle, avoiding forceful maneuvers that could damage surrounding components.
Pay attention to any lines or hoses connected to the rack, and cap them to prevent contamination. Once free, carefully maneuver the old rack out from under the vehicle, preparing for the installation of the new unit.
Installation of the New Rack
Carefully position the new manual steering rack into place, aligning it with the mounting points on the Foxbody’s frame. Secure it using the original mounting bolts, tightening them to the manufacturer’s specified torque. Reconnect the steering column to the rack, ensuring proper alignment of the U-joint or rag joint.
Attach the tie rod ends, mirroring the original positions noted during removal. Double-check all connections for security. Cap any open lines previously disconnected. Lower the vehicle gently, and then re-torque all bolts after a brief test drive.
This ensures everything settles correctly and maintains optimal steering performance.
Alignment After Installation
Post-installation, a professional wheel alignment is absolutely crucial for optimal handling and tire wear. Manual steering racks, even new ones, can introduce slight variations requiring precise adjustment. This process ensures the vehicle tracks straight and the steering wheel remains centered.
Specifically, camber, caster, and toe angles must be verified and adjusted to factory specifications for your Foxbody model year. Improper alignment can lead to uneven tire wear, reduced handling performance, and even steering instability.
Don’t skip this step; it’s a vital investment in safety and longevity.
Choosing the Right Manual Steering Rack for Your Foxbody
Selecting a rack involves considering OEM versus aftermarket options, desired gear ratios, and ensuring compatibility with your specific Foxbody’s production year.
Aftermarket Options vs. OEM
Original Equipment Manufacturer (OEM) racks provide a direct replacement, ensuring fit and function mirroring the factory specifications for your Foxbody. They offer reliability and are generally a safe bet for a restoration or maintaining a stock feel. However, OEM racks can be harder to find in good condition and may not offer performance enhancements.
Aftermarket options, conversely, often prioritize performance improvements. These racks may feature quicker steering ratios, stronger internal components, or designs aimed at reducing weight. Brands like Flaming River and Borgeson offer various choices. While potentially enhancing handling, aftermarket racks require careful research to confirm compatibility and may necessitate modifications to your Foxbody’s steering system. Consider your driving style and intended use when deciding between OEM and aftermarket.
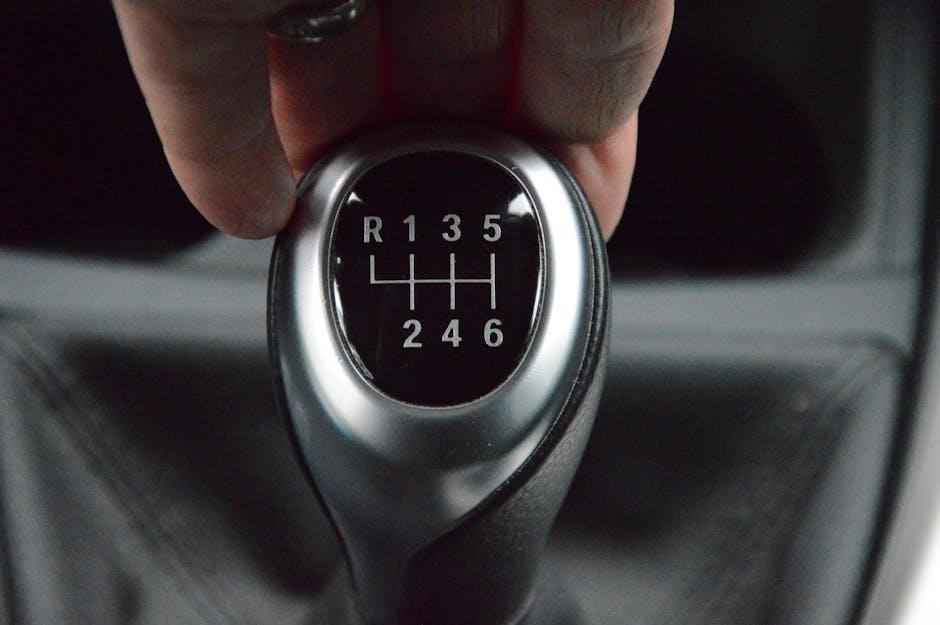
Gear Ratio Considerations
Gear ratio significantly impacts steering effort and responsiveness in your Foxbody’s manual steering system. A lower ratio (e.g., 12:1) means fewer rotations of the steering wheel are needed for a given wheel turn, resulting in quicker, more direct steering. This is ideal for track use or aggressive driving, but requires more muscle.
Higher ratios (e.g., 16:1 or 20:1) offer easier steering at low speeds, making them suitable for street driving and parking. However, they demand more wheel rotation for the same steering input. Carefully assess your driving needs. A stock Foxbody typically uses a ratio around 16:1. Changing this ratio alters the steering feel dramatically, so consider the trade-offs between effort and responsiveness.
Compatibility with Your Foxbody Year
Foxbody Mustangs (1979-1993) experienced minor steering component variations throughout their production run. While most manual steering racks are broadly interchangeable, subtle differences exist. Early models (1979-1986) may have slightly different mounting points or hose connections compared to later ones (1987-1993).
Always verify compatibility with your specific year and model before purchasing a replacement rack. Cross-referencing part numbers is crucial. Some aftermarket racks are designed as universal fits, requiring minor adjustments. Ensure the steering column connection and tie rod end tapers match your Foxbody’s specifications to avoid installation headaches and ensure proper alignment.
Maintenance and Care for Your Manual Steering Rack
Regular inspections are vital for longevity. Check for leaks around seals and connections, and protect components from corrosion with appropriate coatings.
Regular Inspection
Consistent visual checks are paramount for a healthy Foxbody manual steering rack. Begin by carefully examining the rack itself and all connected lines for any signs of fluid leakage, even in a manual system where seals are critical. Pay close attention to the areas where the steering column connects and where the tie rods attach.
Next, inspect the tie rod ends for play or damage. Excessive movement indicates wear and potential steering issues. Also, thoroughly check the pitman and idler arms for looseness or corrosion. A rusty or damaged arm can significantly affect steering precision.
Finally, routinely assess the steering linkage for any bent or broken components. Early detection of these issues prevents more substantial problems down the road, ensuring safe and responsive handling.
Lubrication
While a manual steering rack doesn’t utilize hydraulic fluid, lubrication remains crucial for longevity. Focus on the moving parts – specifically, the steering column connection and the ball joints within the tie rod ends. These areas experience significant friction during operation.
Apply a high-quality chassis grease to the ball joints regularly, ensuring thorough coverage. For the steering column connection, a light coating of grease will minimize wear and prevent binding. Avoid over-greasing, as excess lubricant can attract dirt and debris.
Consistent lubrication reduces friction, promotes smooth operation, and extends the lifespan of these vital components, contributing to precise steering and a more enjoyable driving experience.
Protecting Against Corrosion
Foxbody steering components are susceptible to corrosion, especially in regions with harsh winters or coastal climates. Road salt and moisture accelerate rust formation on the manual steering rack, tie rods, and other exposed parts.
Regularly wash the undercarriage of your Foxbody, paying close attention to the steering system. Apply a rust inhibitor or undercoating to create a protective barrier against the elements. Inspect components for existing rust and address it promptly with a wire brush and rust converter.
Preventative measures significantly extend the life of your steering system, ensuring reliable performance and avoiding costly repairs down the road.
Troubleshooting Common Manual Steering Problems
Diagnosing issues like steering play or noise is crucial for maintaining a responsive Foxbody. Identifying leaks promptly prevents further damage to the system.
Diagnosing Steering Play
Excessive steering play in a Foxbody’s manual rack indicates looseness within the system. Begin by securely jacking up the front end, ensuring the wheels are off the ground. Grasp the steering wheel and attempt to move it side-to-side without the wheels turning. Any noticeable movement before the wheels respond signifies play.
Inspect the tie rod ends for wear; looseness here is a common culprit. Also, carefully examine the manual steering rack itself for internal damage or worn components. A mechanic’s stethoscope can help pinpoint noise originating from the rack. Remember to check the Pitman arm and idler arm connections for any slack. Addressing play promptly improves handling and prevents further wear on steering components, ensuring a safer driving experience.
Addressing Noisy Steering
Unusual noises during steering on a Foxbody often point to specific issues. Groaning sounds can indicate a lack of lubrication within the manual steering rack, or potentially worn internal components. Clicking or popping noises frequently originate from worn tie rod ends or ball joints. A high-pitched whine might suggest air entering the system, even in a manual setup, potentially through deteriorated seals.
Carefully inspect all steering linkage connections for tightness. Use a stethoscope to isolate the noise source. Regularly lubricating the steering components can alleviate some noises. If the noise persists, a thorough inspection of the rack and associated parts is crucial to prevent further damage and maintain safe steering control.
Identifying Potential Leaks
Although manual steering doesn’t utilize hydraulic fluid like power steering, leaks can still occur. These aren’t fluid leaks, but rather seepage from the steering rack seals, allowing dirt and debris to enter. Inspect the rack housing and boots for any signs of grease or grime expulsion. Look closely at the steering column connection and where the tie rods attach.
Even small amounts of contamination can accelerate wear. Check for dampness around the rack mounts. While not a fluid leak, compromised seals diminish the rack’s lifespan. Address any seal deterioration promptly to prevent internal damage and maintain optimal steering performance. Regular visual inspections are key.